Documenting a project
To documente a Grafcet project, there is a simple multi-line comment field and a versatile documentation box.
Furthermore, user-defined tool tips can be created for each Grafcet element.
You can also link Grafcet elements to each other to jump to specific points in the project more quickly.
Comment field
The Grafcet plan can be equipped with text fields via the comment fields:
In the picture you can see the icon for the comment field. This is how you can create it:
- Click on the icon with the left mouse button and keep it pressed.
- Move the mouse pointer to the desired target position
- Release the mouse button
After creating it, you can edit it with a double mouse click. With the Esc-key you can exit the editor. Alternatively, click on another position on the drawing area.
A comment field can also be created from the symbols table. The advantage is that the symbols comment is then included immediately:
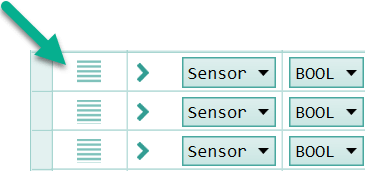
- Find the desired symbol in the symbol table.
- Click on the Drag-Drop symbol (see picture above) and keep the mouse button pressed.
- Move the mouse pointer to the target position on the drawing area
- Release the mouse pointer again.
The comment field can be one line or multiple lines. To create a multiline field, simply press the Return key while editing.
Comment field special functions
- Useful: The comment field can display the value of symbols in watch mode. Example: water level={water level}. In observation mode, for example, Water level=789 is displayed.
- Comment fields can be translated via the Google-Translater. See context menu (right mouse button).
- Comment fields can have different font sizes and background colors. See context menu (right mouse button).
Documentation box
Important:
The documentation box is available with version 2.0.0.0 of Grafcet-Studio.
The documentation box is the "big brother" of the comment field and it offers:
- Different sized headings
- Enumerations (with and without numbering)
- Displaying pictures (local or picture from the Internet)
- Text decorations like bold, underlined, strikethrough, italic
- Tables
- Different text colors
The different formatting is realized by the popular Markdown-Syntax.
The documentation box can be dragged onto the drawing area using this symbol:
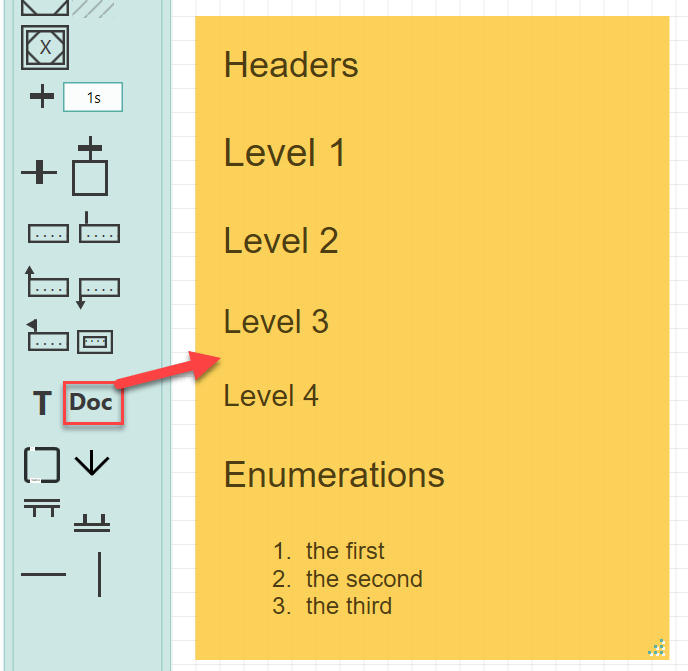
After placing the box, you should set the desired size with the mouse. (It is helpful to zoom-out the drawing area before).
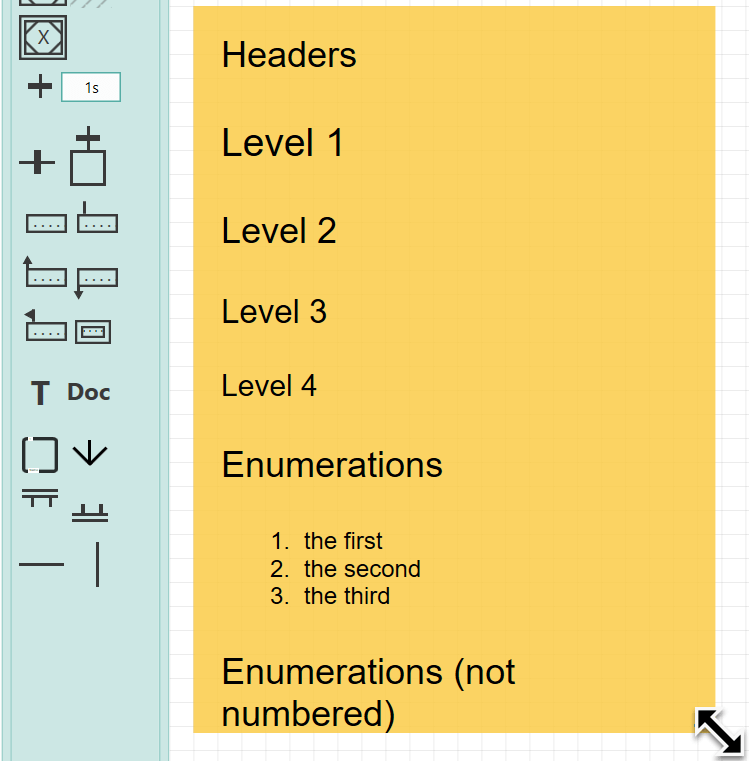
The box has no scrollbars (otherwise printing would not be possible), so it must be sufficiently large.
If a new box is dragged onto the drawing area, a default content is displayed. Using this default content, you can always see what the syntax for formatting looks like. By double-clicking on the box, you can switch to editor mode and see the syntax. For this reason, no markdown syntax is described here.
The default content can be changed if necessary: Simply change the documentBox.md file in the Grafcet-Studio installation directory.
Editing the Document Box
You can switch to the editor mode with a double click on the box. The source code is then displayed in Markdown syntax in a text editor:
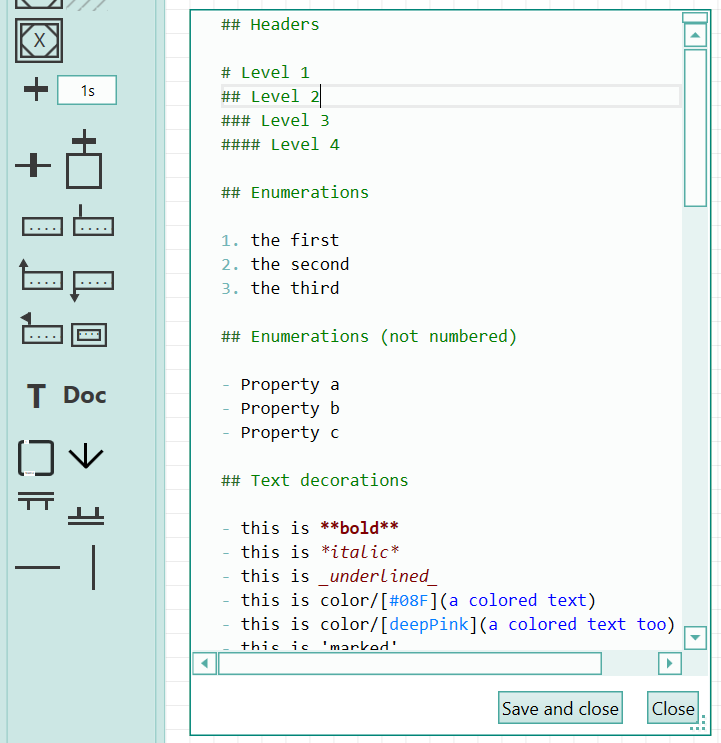
The text editor indicates the appearance by highlighting and different colors. Changed lines are marked with a small rectangle on the left side of the line.
With Ctrl+S you can save the content and close the editor.
Further notes on the documentation box
- You can create several documentation box, which can be different in size.
- The documentation box is transparent. If you display a transparent PNG graphic, you can, for example, place a red circle (PNG file) over the Grafcet chart and mark something important.
- In the table of the documentation box, all columns are always the same width. This cannot be changed at the moment.
- The box cannot display values of symbols (unlike the comment field).
Hint:
Via the file Markdown.Styles.Default.xaml in the installation directory of Grafcet-Studio you can adapt the styles (font, font size, ...) of the individual elements to your needs. However, make sure that the XML structures do not become invalid.
User defined tooltips
User-defined tool tips can be used to create notes for each Grafcet element which are displayed when the user hovers over the Grafcet element with the mouse.
Example:
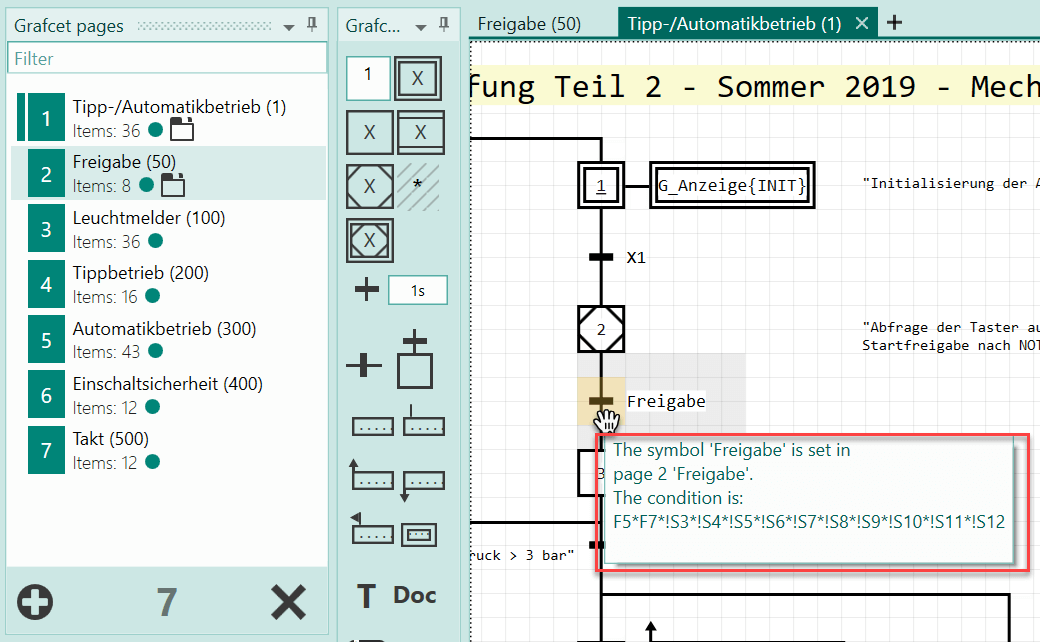
The disadvantage of these notes is that they can't be printed.
How to define the texts:
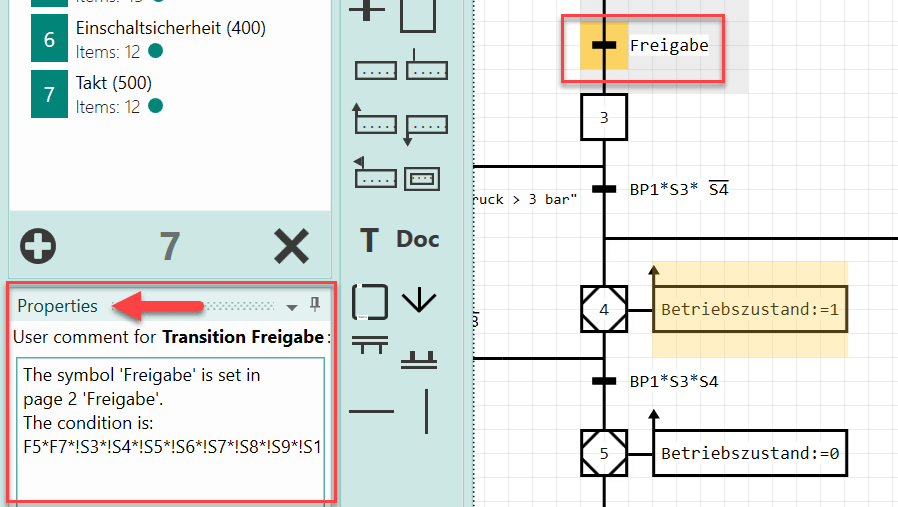
Select the Grafcet element (step, transition, action). You can then define the text in the Properties field (see picture).
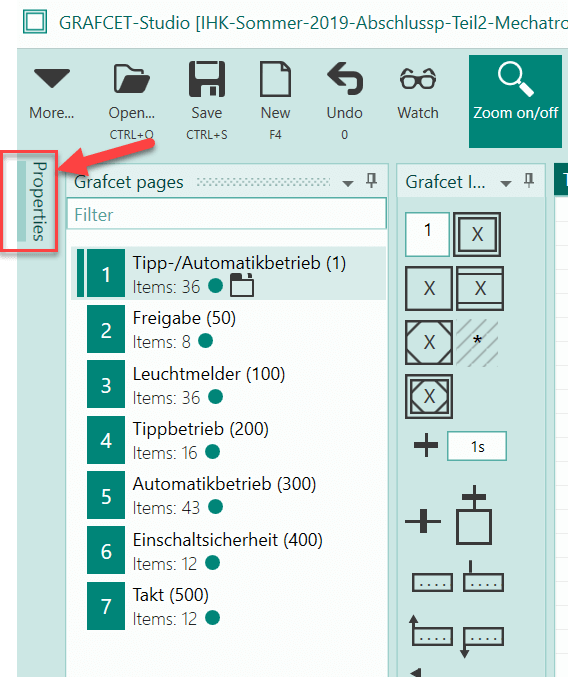
You may have to show the Properties window first:
Linking of Grafcet elements
For larger projects, it is often useful to link the elements with each other to find specific locations more quickly (like bookmarks).
In Grafcet-Studio you can link each Grafcet element with another.
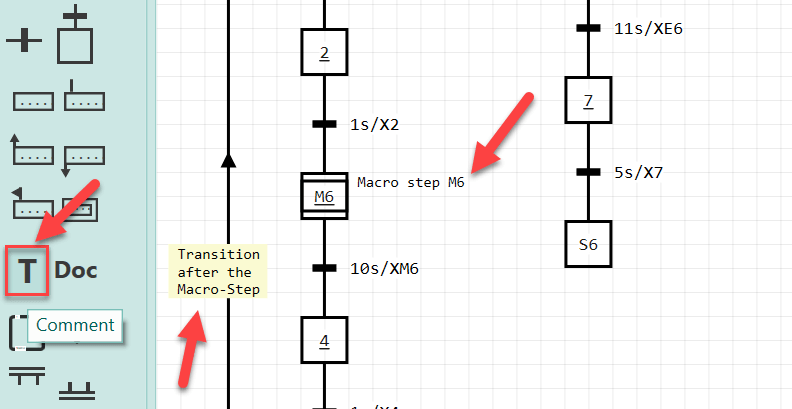
If a link already exists, you can jump to the target object by calling the command Go to editor target object from the context menu.
Image:
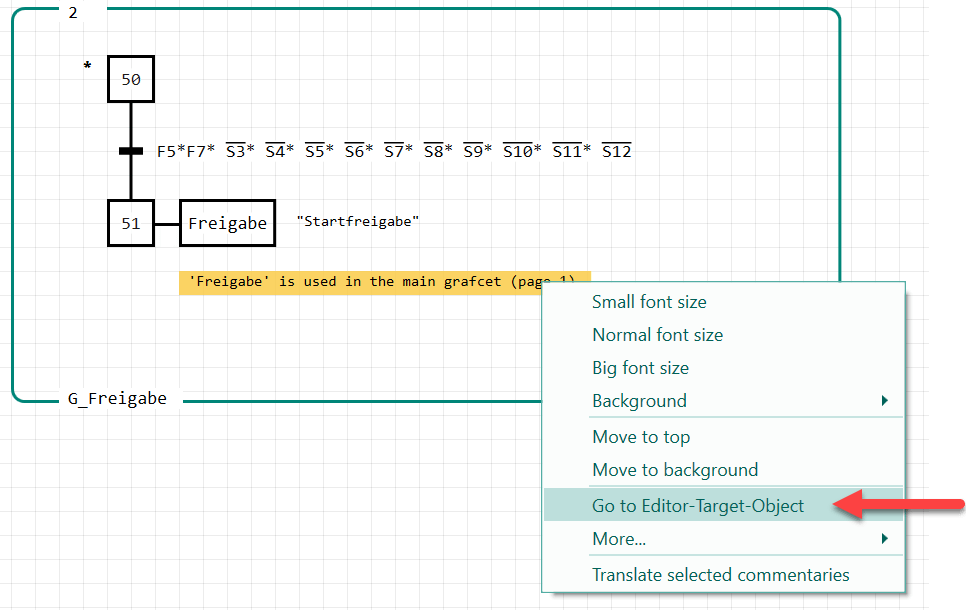
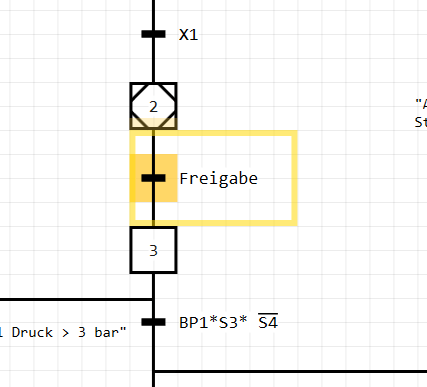
The target object (here a transition) is then displayed:
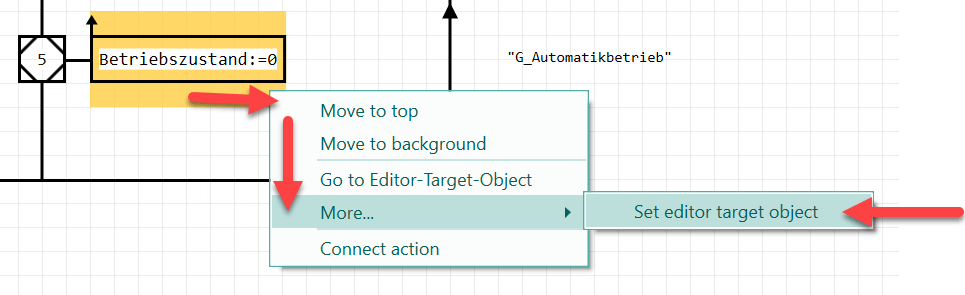
This is how the link can be set up:
- Calling the context command More->Set Editor Target Object
- Click on the target object within 30 seconds while holding down the Ctrl key. If successful, the text Editor Jump object has been defined will be displayed in the upper left corner of the drawing area.
Call the context command:
The following objects are already linked to the target with a ready link:
| Grafcet Object | Target Object |
|---|---|
| Enclosing Step | The associated enclosure |
| Enclosing Initial Step | The associated enclosure |
| Macro Step | The associated expansion |
| Jump | The destination step |
| Forced control | The corresponding Grafcet group |